Save
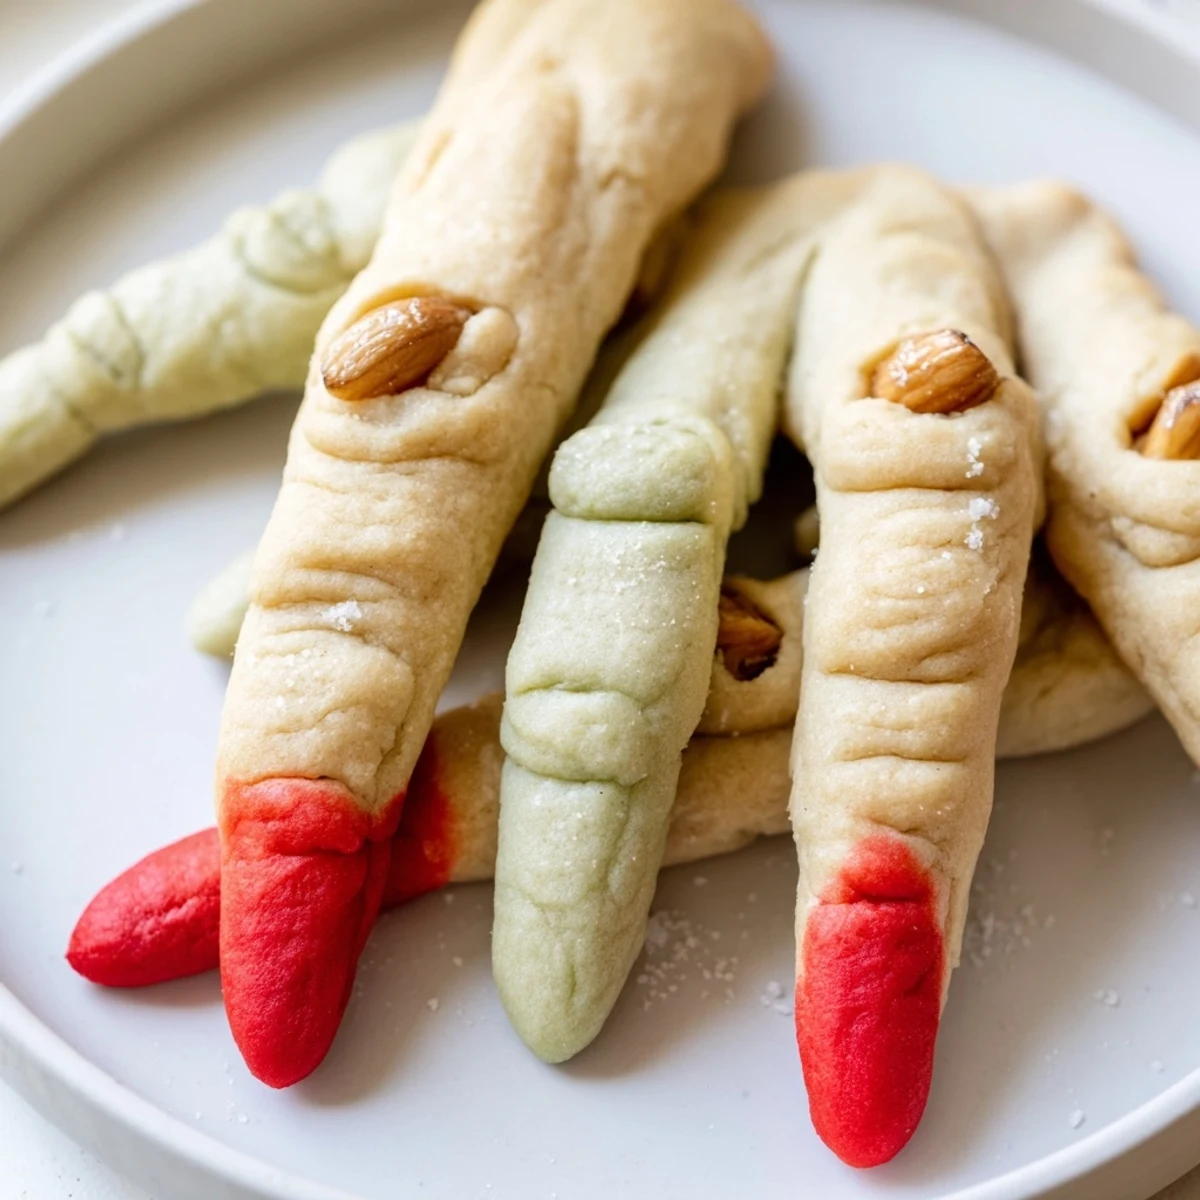
Save These delightfully creepy almond-flavored butter cookies are shaped into witch fingers with blanched almond fingernails and a bloody red accent. The dough comes together quickly with softened butter, sugar, vanilla, and almond extract, then gets rolled into finger shapes and scored with knuckle details. After baking to golden perfection, you add the final spooky touch by painting the fingernail beds with red gel or jam before reattaching the almonds. Each cookie delivers a buttery, almond-rich bite that's both festive and delicious.
My daughter begged me to make these for her class Halloween party three years ago, and I've never seen kids get so excited (and slightly terrified) over cookies before. The way their eyes widened when they realized these were edible witch fingers was absolutely priceless. Now they're requested every October without fail.
Last year I brought a platter to my office potluck and watched my normally serious coworker actually jump back when she reached for one. We all laughed so hard that the breakroom conversation shifted completely to childhood Halloween memories. Sometimes food is just the excuse we need to let loose and remember what it feels like to be delightfully scared together.
Ingredients
- Unsalted butter: Room temperature butter creates the perfect tender crumb that holds those creepy finger shapes without spreading too much in the oven
- Granulated sugar: This sweet foundation balances the almond extract while giving the cookies their slight crisp on the outside
- Large egg: One egg is all you need to bind everything together into a smooth workable dough that wont stick to your hands during shaping
- Almond extract: This is the secret ingredient that makes these taste sophisticated rather than just like sugar cookies
- All-purpose flour: The protein structure here keeps those knuckle details from melting away in the heat
- Baking powder: Just enough lift to make the fingers puff slightly without losing their spooky finger-like appearance
- Whole blanched almonds: These create the most disturbingly realistic fingernails youll ever want to eat
- Red gel food coloring or strawberry jam: The bloody detail takes these from cute to absolutely gnarly
Instructions
- Get your oven ready:
- Preheat to 325°F and line two baking sheets with parchment paper so your witch fingers bake evenly without sticking
- Cream the butter and sugar:
- Beat them together until the mixture turns pale and fluffy, which usually takes about 3 minutes of serious mixing
- Add the wet ingredients:
- Beat in the egg, vanilla extract, and that crucial almond extract until everything is completely combined
- Whisk the dry ingredients:
- In a separate bowl, combine the flour, baking powder, and salt so they distribute evenly throughout the dough
- Bring the dough together:
- Gradually mix the dry ingredients into the wet ones, stopping as soon as the dough forms to avoid tough cookies
- Shape the fingers:
- Roll tablespoon portions of dough into 3 to 4 inch logs, then use a knife to create knuckle lines and press an almond into one end for the nail
- Bake until golden:
- Space the fingers about 2 inches apart on the baking sheets and bake for 18 to 20 minutes until theyre lightly golden
- Add the gruesome details:
- Carefully remove each almond, add a drop of red food coloring or jam to the nail bed, then press the almond back into place
- Let them cool completely:
- Transfer to a wire rack so the cookies set properly and the bloody details dont smear
 Save
Save My neighbor's teenage son came over while I was making these last Halloween and actually asked to help shape the fingers. We stood at the kitchen counter making the most grotesque knuckles we could manage, laughing at our creations. He told me later it was his favorite memory from that whole season.
Making Them Extra Creepy
I've learned that tinting small portions of dough with green or gray food coloring creates varied skin tones that look alarmingly realistic on the serving platter. The subtle differences make people do a genuine double-take.
The Bloody Details
Strawberry or raspberry jam works beautifully for the bloody nail bed effect because it adds a slight shine that food coloring alone can't achieve. The fruity sweetness also complements the almond flavor in an unexpectedly sophisticated way.
Serving Suggestions
These cookies pair perfectly with hot mulled cider or even a spooky Halloween cocktail for adult gatherings. The contrast between the creepiness of the appearance and the comfort of the flavors is exactly what makes them so memorable.
- Arrange them pointing outward on a dark platter for maximum shock value
- Consider placing some whole almonds nearby like fallen fingernails
- Label them clearly so guests know theyre edible and not just props
 Save
Save These witch finger cookies have become one of those recipes that marks the season for everyone who tries them. Sometimes the most memorable foods are the ones that make us giggle while we eat.
Recipe FAQs
- → How far ahead can I make these witch finger cookies?
-
You can prepare the dough up to 3 days in advance and store it refrigerated. The baked cookies keep well in an airtight container for up to 1 week, making them perfect for preparing before Halloween parties.
- → What's the best way to create the knuckle details?
-
Use a small paring knife or the back of a butter knife to gently press horizontal lines across the dough fingers. Don't cut too deep — just enough to create realistic creases where knuckles would be.
- → Can I freeze the dough or baked cookies?
-
Yes! Freeze shaped, unbaked fingers on a baking sheet until firm, then transfer to a freezer bag for up to 3 months. Bake from frozen, adding 2-3 minutes. Baked cookies also freeze well for up to 2 months.
- → What alternatives work for the bloody fingernail effect?
-
Red gel food coloring works best for a fresh-look effect. For a gooier, more realistic appearance, strawberry or raspberry jam creates a wonderfully gruesome "blood" that everyone will love.
- → How do I prevent the almonds from falling off during baking?
-
Gently press the blanched almond into the dough end before baking, creating a small indentation. The almond will set into the dough as it bakes. Add the red coloring underneath when reattaching after baking for extra hold.